Have you ever had the urge of doing something to your hair whenever you are faced with a problem, whether that be in work or in your relationships? Some people handle this kind of stress by eating, others by shopping, me? I like doing something to my hair. I have gone from having really short hair to having light highlights to perming, you name it, I have probably done it. My poor hair.
Anyway, there are A LOT of available hair service packages at probably every group buying sites I know of, but even though they claim that these services are highly discounted, I often times find them still pricey; most especially for hair coloring packages.
So, in my desperation, I had decided to just buy a hair coloring product from the store. I was eyeing ETUDE house's Bubble Hair Color (approximately Php480.00/ box) simply because it seems very easy to apply. Unlike the conventional do-it-yourself hair color from Loreal, Garnier, etc. Etude's bubble technology makes the application easier.
Since the mall that I visited does not have an Etude House branch, I had to settle for the next best thing. I went to the supermarket and scoured the hair product aisle - and guess what? I found a Korean brand hair color using the same bubble foam technology!


Okay, it may seem that the color I chose (Kiwi Cocoa) is a bit scary, but please remember that having dark hair would never result to the same color as that on the packaging. You'd have to have your hair bleached first.
Anyway, here's a preview of my (rowdy, just-got-out-of-bed) hair before coloring:
The LOLANE Z-COOL Bubble Foam Hair Color costs around Php380.00/box. It contains the following items:

I thought to prepare the following additional items too:
I don't want to stain my towels so I decided to use a garbage bag as protective cape instead. Using your scissors, create a small cut on the bottom of the garbage bag. This is where you are going to insert your head before you start coloring your hair. It will not only keep your clothes from getting stained, it will also protect your neck and nape.
Okay, so here's a step-by-step guide on how I used the Lolane Z-Cool Bubble Foam hair color:
***Note: If you have allergies on hair color, you must first conduct a skin-test. There is a step by step instructions on how to do that mentioned in the pamphlet.


After application, the instructions suggest that you allow it to set for 30 minutes. but if after 30 minutes and the color is not as vibrant, you can keep it on there longer. I decided to keep mine longer because I really want a vibrant hair color. I let it stay there for about 2 hours!
Wash your hair thoroughly and apply the Keratin Hair mask to revitalize your hair. I notice that after I washed the product off, my hair felt rough and very dry. So, I had to apply three different types of conditioners. (Tresemme, Dove and the Lolane Keratin Mask)
Dry your hair and see the results!


Anyway, there are A LOT of available hair service packages at probably every group buying sites I know of, but even though they claim that these services are highly discounted, I often times find them still pricey; most especially for hair coloring packages.
So, in my desperation, I had decided to just buy a hair coloring product from the store. I was eyeing ETUDE house's Bubble Hair Color (approximately Php480.00/ box) simply because it seems very easy to apply. Unlike the conventional do-it-yourself hair color from Loreal, Garnier, etc. Etude's bubble technology makes the application easier.
Since the mall that I visited does not have an Etude House branch, I had to settle for the next best thing. I went to the supermarket and scoured the hair product aisle - and guess what? I found a Korean brand hair color using the same bubble foam technology!
Okay, it may seem that the color I chose (Kiwi Cocoa) is a bit scary, but please remember that having dark hair would never result to the same color as that on the packaging. You'd have to have your hair bleached first.
Anyway, here's a preview of my (rowdy, just-got-out-of-bed) hair before coloring:
 |
| Current hair color: Chestnut Brown, Coco Hair color from Tony and Jackey Salon at Fisher Mall QC |
The LOLANE Z-COOL Bubble Foam Hair Color costs around Php380.00/box. It contains the following items:
 |
| 1pc Keratin Repair Mask (Conditioner) (15gms) |
 |
| 1pc LOLANE Z-COOL Coloring Agent in Kiwi Cocoa |
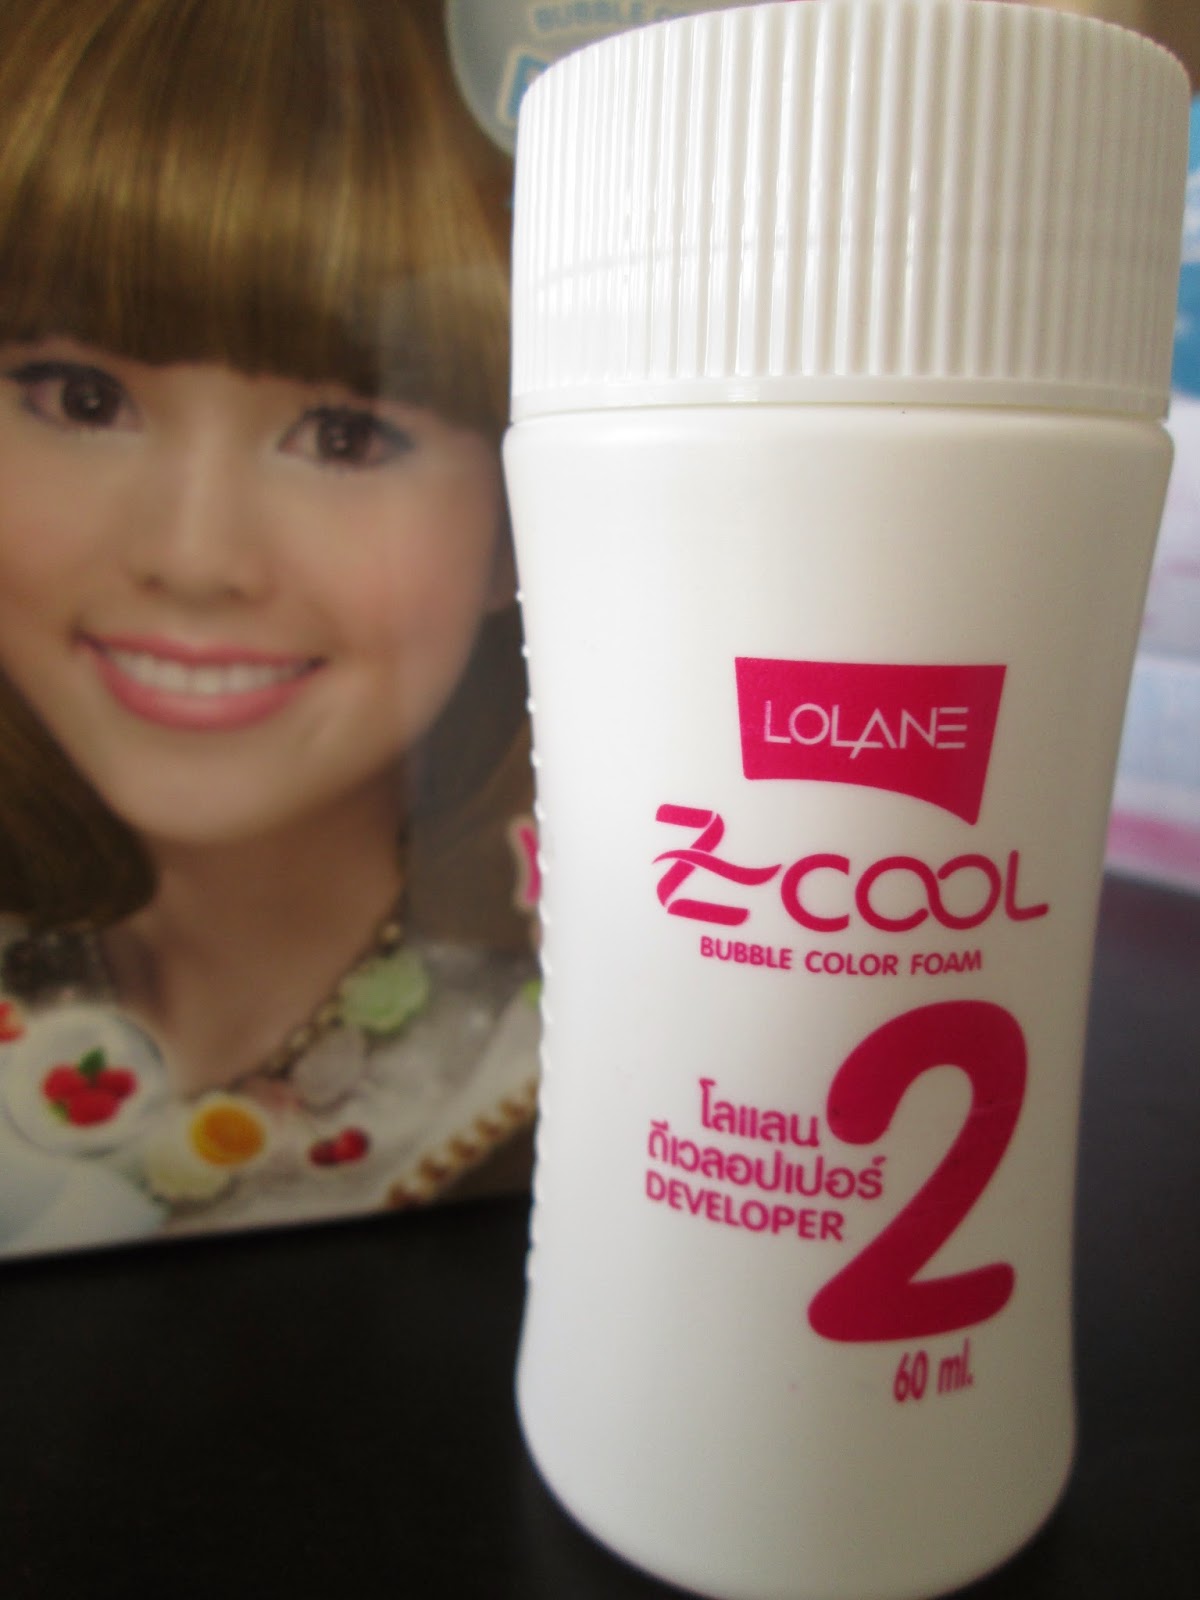 |
| 1pc LOLANE Z-COOL Color Developer |
 |
| Accessories: Bubble Foam Nozzle, Instructional Guide and 1 set gloves |
I thought to prepare the following additional items too:
 |
| Garbage Bag and a pair of scissors |
Okay, so here's a step-by-step guide on how I used the Lolane Z-Cool Bubble Foam hair color:
***Note: If you have allergies on hair color, you must first conduct a skin-test. There is a step by step instructions on how to do that mentioned in the pamphlet.
- Make sure that you have prepared all items in front of you. If you are working alone, a mirror would be of big help.
- The manual specifically said that your hair should be dry, clean and free from any styling agent (wax, oil, leave on conditioner, etc.)
- Wear a protective sheet between your hair and your body. (I used the garbage bag here)
- Remove all your accessories (rings, earings, necklace, etc.)
- Comb your hair and partition them by using clamps. I did a half updo to section my hair. If yours is thicker and longer, you might want to section it into four or more. It will be easier for you to color it if it is sectioned that way.
- Wearing the gloves provided, carefully pour the coloring agent (bottle 1) into the color developer (bottle 2). Using the foaming nozzle, tightly screw the lid on.
- SWIRL the bottle carefully to mix the coloring agent and the color developer. NEVER EVER SHAKE! It might lessen the foaming ability of the color developer. About 5-10 times.
- Pump a small amount onto your palm, put your palms together to equally distribute the product and apply it evenly on your hair.
- Apply the foam carefully and evenly on your hair, making sure that you've got every area covered, from roots to tips. You don't want to end up with unequal hair color. NEVER RUB/ MASSAGE THE PRODUCT INTO YOUR SCALP.
So, basically, I am happy with the color pay off. It may look reddish brown on the photo but in real life it looks light yellowish brown. I notice too, that it made my skin look lighter.
To tell you honestly, I was not even able to finish the entire bottle, considering that I have long and thick hair! For less than Php400.00, I was able to choose the color I want and I was able to dictate how vibrant I want it to be without spending too much! It is indeed a great bargain!
This revolutionary foam technology made personal hair coloring easier and faster (and less messy!) because it doesn't drip (like the usual liquid hair color). In less than 30 minutes I was able to cover my entire hair! I would definitely recommend this to anyone who want to change their looks without spending too much!
Wah. Really? 2 hours? D: You're right about the "urge." I just started playing with hair colors this year. Still haven't cross the "bleach" boundary XD. Nice review! I might try that brand. I just tried the Schwarzkopf foam hair color few days ago :D I like it but I think it's a bit expensive (599 pesos).
ReplyDeletehttp://ladyarizel.blogspot.com/
QUANTUM BINARY SIGNALS
ReplyDeleteProfessional trading signals delivered to your mobile phone every day.
Follow our trades right now and gain up to 270% per day.