A true chocolate lover finds ways to accommodate his passion and make it work with his lifestyle. One key, not just to keeping weight down and staying guilt-free, but also to keeping taste buds sharp (essential for the professionals who evaluate new products as well as judge recipes), Is being discriminating. - Julie Davis of the Los Angeles Times, 10/30/85
 |
| photo credit: abountifulkitchen.com |
I don't know about you but I have been in love with chocolates since time immemorial. It has been my go-to-thing whenever I'm sad, happy, excited, bored or just because.
Some people condemn chocolates because it makes them breakout, fat, diabetic, etc. Little do they know, chocolates does not just taste like heaven, it also has its fair share of health benefits, here are some examples:
1.) BETTER THAN YOUR ENERGY DRINK
Better toss your energy drink, protein shakes and whatever it is you have on hand while working out, to the trash bin! It has been found out that Chocolate Milk is an effective recovery drink and relieves muscle soreness after a hefty workout.
2.) REDUCES THE RISK OF HEART DISEASE
Chocolates derived from processed cocoa seeds, they are rich in flavonoids (which is a type of phytochemical) these has anti-inflammatory and cell-protective properties associated to reduce the risk of heart disease. To maximize this benefit, better stick with dark chocolates.
3.) BEST COMFORT FOOD
Guys prefer beer and cigarettes whenever they are down and out. Majority of the female population however prefer chocolate bars whenever they feel terrible. This is perhaps chocolates stimulates the release of endorphins, a natural hormone produced by the brain that generates feelings of pleasure and happiness.
Anyway, the list of benefits of eating (more like DEVOURING) chocolates could go on and on, but the reason why I wrote this blog is to teach you how to make a Chocolate Ice Cream Cake at the comfort of your own home. You will not believe how simple and easy it is to make this delectable dish! You and your kids would definitely fall in love with this recipe, I assure you that!
So, before we begin, here is a list of the things you will need:
INGREDIENTS:
a.) Bottom Layer (Fudgy Brownie)
10 Tablespoon Unsalted Butter
1 1/4 cup granulated sugar
3/4 cup + 2 Tablespoon Cocoa Powder
1/4 teaspoon salt
1 teaspoon vanilla extract
2 eggs
1/2 cup all purpose flour
optional: 1/4 cup walnuts
b.) Chocolate Ice Cream
2 tablespoon cocoa powder
5 tablespoon hot water
7 oz dark chocolate bar
1 1/2 cup cold all purpose cream
1 tablespoon sugar
1/4 teaspoon salt
walnut for garnish
PROCEDURE:
a.) Fudge Brownie Layer
- In a bowl, mix together all your dry ingredients. It is a must to mix your dry ingredients first prior to mixing in your wet ingredients because it will guarantee that everything is well incorporated.

- After ensuring that everything is well incorporated, you may start mixing in your wet ingredients starting with the butter. Make sure that your butter is at room temperature. Do not heat your butter in the microwave as it will breakdown the fats. It is better to leave your butter outside the refrigerator before you bake ensuring that it is in the right consistency. Follow it up with the eggs and the vanilla flavor. It is also important to not overmix the batter. Overmixing the flour will release gluten, resulting to tough dough. As soon as you don't see anymore dry ingredients, let go of your spatula or fork, it should be okay.


- At this point, you can see that I have not incorporated the walnut yet. This is because the dough is really thick and I don't want all the walnuts to end up at the bottom of the pan or gathered at one area only. By this time, you should have also pre-heated your oven at 150 degrees Celcius. Line your pan with a parchment or wax paper.

- Pour the batter onto your pan and spread the batter evenly using the offset spatula. This is normally the point when I add the walnuts, making sure that they are evenly distributed.

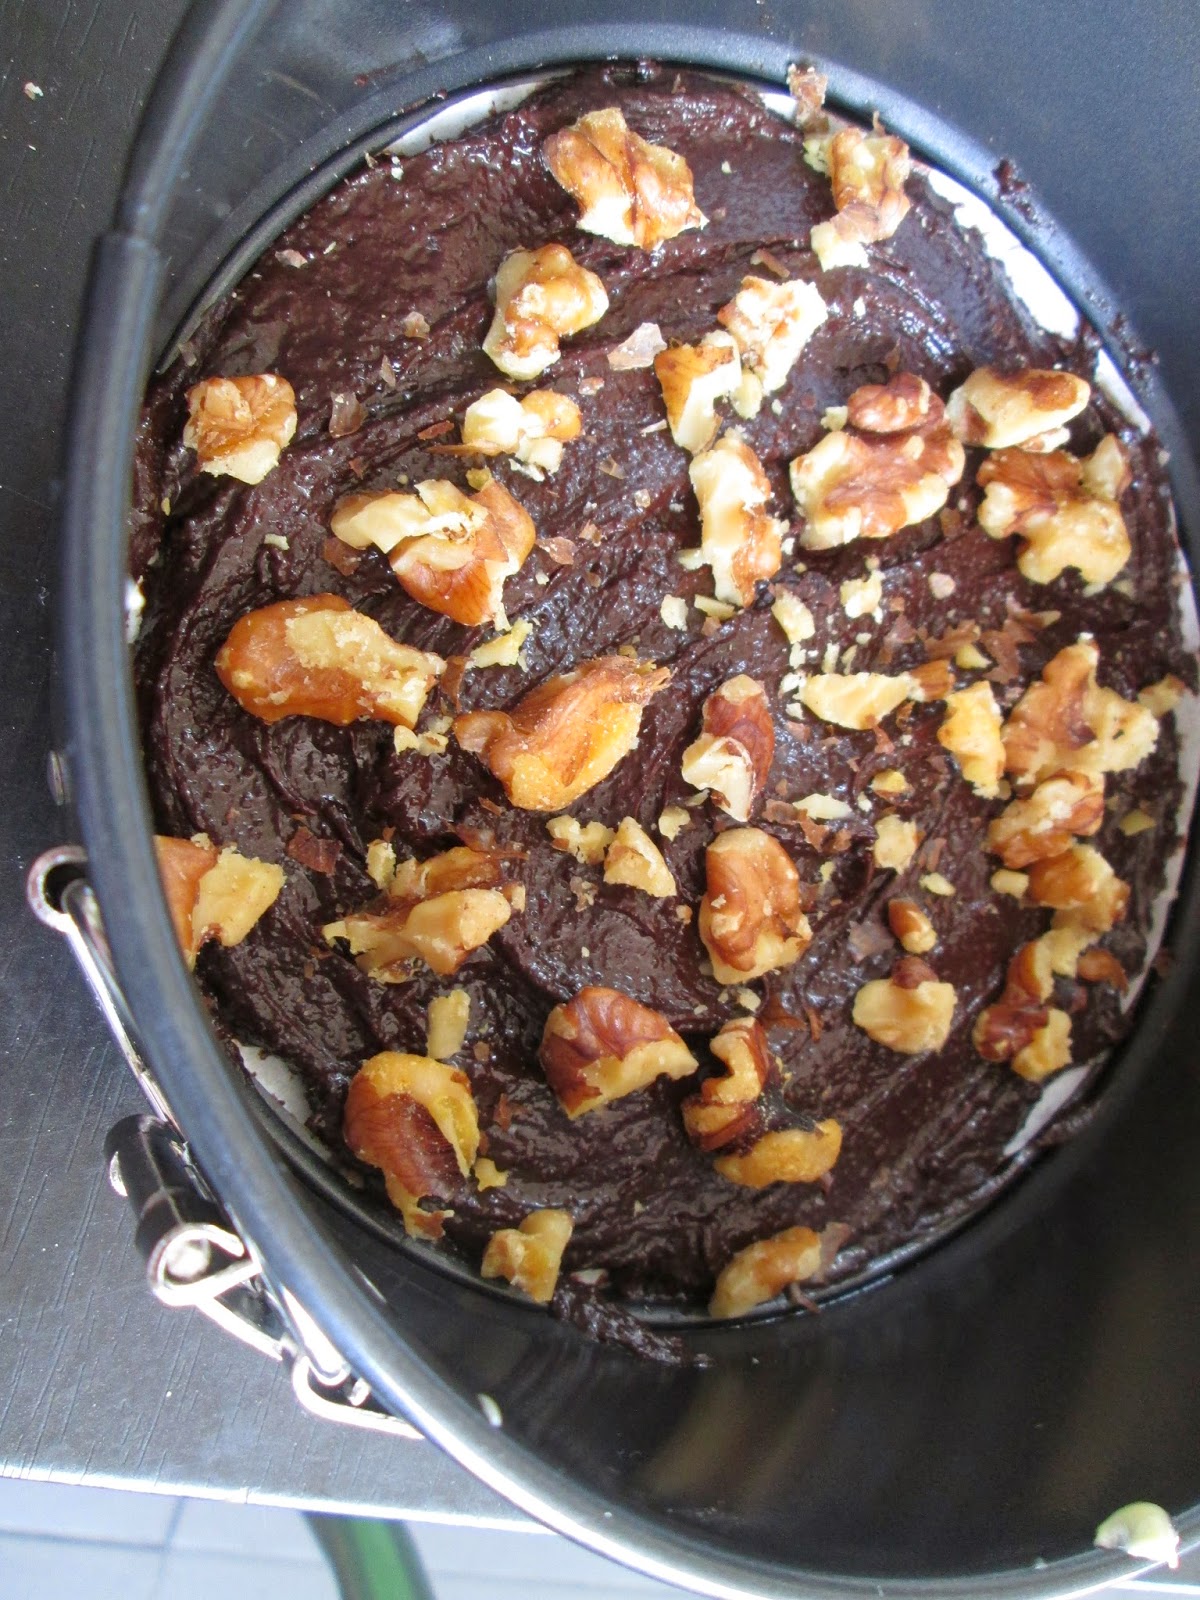
- Bake your fudge brownie for 20 minutes at 150 degrees Celcius or until no crumbs stick onto a toothpick when the center is pricked.

While your brownie is baking, it's time to start with the fun part, very easy Ice Cream mixture!
- Put all your wet and dry ingredients together in a plastic mixing bowl. Except the all purpose cream. I highly recommend you to use a very good dark chocolate bar at this point. Using low grade, low quality chocolate could render this recipe useless. I discovered a fairly priced chocolate called Selbourne.


Pop everything in the microwave and heat it at medium for 2 minutes. Mix them together until the chocolate bar dissolves, set aside to cool.
- Get your all purpose cream from the freezer. Note: the cream should be cold, not frozen or it will not whip up properly.


- Whip your cream using a hand mixer until it doubles it size. Whipping the cream creates a mousse-like texture, believe it or not, this is your ice cream. Actually, it tastes better than ice cream!

Cool your brownie to room temperature before pouring the "ice cream." Pouring it while it's hot would just melt the cream rendering your recipe useless. I know you'd want to stick your finger in it and taste it, but believe me, it is better frozen!
After pouring the cream mixture into the pan, put it in the freezer and wait for about 30 minutes and it should look like this! You can opt to garnish your cake with walnuts or you can pour melted chocolate over it if you want a chocolate overload!


I swear, you will never have to purchase ice cream cake at the store anymore when you taste this recipe! Share your experience by commenting below. Goodluck!
Comments
Post a Comment